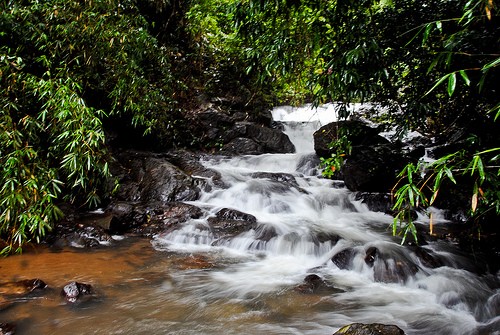
For a traveler, waterfalls are among the most beautiful and interesting sights to watch. It is natural that you would like to capture the beauty of a waterfall in frame. Most people with a point and shoot camera capture the waterfall image as it appears to them. However if you own a DSLR or a camera in which the aperture and shutter speed can be controlled, you can create surreal and beautiful photographs of the waterfalls. In this small article we are going to see to capture beautiful waterfalls.
 The two things which must be kept in mind for the shoot are the time and place. Choose the right time to take the photograph, when the sunrays are less strong and you can control the amount of exposure your camera gets. Secondly, choose the place from which your frame may be able to capture the might and the beauty of the waterfall. Do not ignore the foreground as in a rocky terrain of a stream, it can create interesting pictures. Most important- stay out of harm’s way, both to you and the camera.
Coming to the dreaming shot, you will need some equipment. A tripod is a necessity in this type of shoot as you will need to keep the camera very stable for a second or so. So unless you have rock steady arms, try to find a suitable place where the camera can be kept without shake. A filter may also be required to cut off the light coming to the camera. Having mentioned the equipment, now let’s get the process in steps:
- Mount the camera on the tripod
- Get to the auto mode and check the settings. Note the shutter speed.
- For the blurry dreamy look of the waterfall, go to the shutter priority mode and try shooting with low shutter speeds of 0.5s, 1s, 2s. Note where the camera starts overexposing.
- If the light conditions are optimum, you may be able to get the image at shutter speeds between 1s to 2s. However if the light is too much then:
- Go to manual mode
- Lower ISO to 100
- Keep the shutter speed to 2 s
- Keep lowering the aperture till you get optimum exposure on your light sensor.
- Click
- If the exposure is still high, then you may need a filter. If you do not have a filter then switch to aperture priority mode, lower the aperture to minimum possible level and then shoot with the hope that the camera will take care of the rest.
If you feel all this is unnecessary complicating the seemingly simple shooting of a waterfall then I would suggest that you look at the picture given below once again. Believe me, the effort is worth it.

Nice..photography lessons! Just what I needed…now to find a waterfall 🙂
This reminds me that I need to update this article and mention the use of ND filters. Thanks for bringing this one back 🙂